|
||||||||||
| PREV PACKAGE NEXT PACKAGE | FRAMES NO FRAMES | |||||||||
See:
Description
| Interface Summary | |
|---|---|
| Configuration<TreeNode> | Used to configure the tree layout algorithm. |
| NodeExtentProvider<TreeNode> | Provides the extent (width and height) of a tree node. |
| TreeForTreeLayout<TreeNode> | Represents a tree to be used by the TreeLayout. |
| Class Summary | |
|---|---|
| TreeLayout<TreeNode> | Implements the actual tree layout algorithm. |
| TreeLayout.DumpConfiguration | |
| Enum Summary | |
|---|---|
| Configuration.AlignmentInLevel | Possible alignments of a node within a level (centered, towards or away from root) |
| Configuration.Location | Identifies the sides of a rectangle (top, left, ...) |
Efficiently create compact, highly customizable tree layouts.
To use the TreeLayout you mainly need to supply an instance of the
TreeLayout class with the nodes of the tree (including "children"
links), together with the "size" of each node. In addition you can configure
the layout by specifying parameters like "gap between levels" etc..
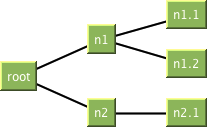
Based on this information TreeLayout creates a compact, nice looking layout. The layout has the following properties [2]:
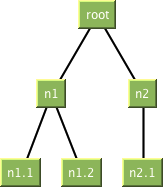
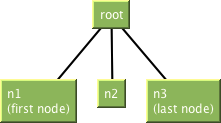
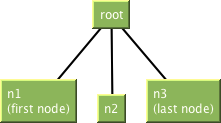
Here an example tree layout:
TreeLayout instance with:
TreeForTreeLayout interface, NodeExtentProvider, andConfiguration.getNodeBounds.
TreeForTreeLayout
interface to access such a tree.
To use the TreeLayout you therefore need to provide it with a TreeForTreeLayout
implementation. In most situations you will not need to deal with all details
of that interface, but create an implementation by extending
AbstractTreeForTreeLayout, or even use the class
DefaultTreeForTreeLayout directly.
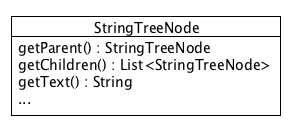
As StringTreeNode provides the children in a list and you can get the parent for
each node you can extend AbstractTreeForTreeLayout to create your
TreeForTreeLayout implementation. You only need to implement two methods and
the constructor:
 public class StringTreeAsTreeForTreeLayout extends
     AbstractTreeForTreeLayout<StringTreeNode> {

     public StringTreeAsTreeForTreeLayout(StringTreeNode root) {
          super(root);
     }

     public StringTreeNode getParent(StringTreeNode node) {
          return node.getParent();
     }

     public List<StringTreeNode> getChildrenList(StringTreeNode parentNode) {
          return parentNode.getChildren();
     }
 }
(Make sure to check out the performance constraints of getChildrenList and getParent.)
As you have no own tree implementation yet you may as well use
DefaultTreeForTreeLayout to create the tree:
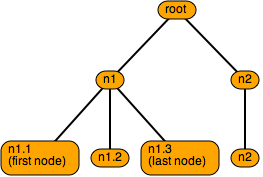
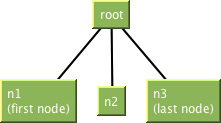
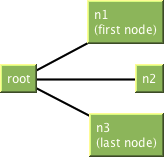
 TextInBox root = new TextInBox("root", 40, 20);
 TextInBox n1 = new TextInBox("n1", 30, 20);
 TextInBox n1_1 = new TextInBox("n1.1\n(first node)", 80, 36);
 TextInBox n1_2 = new TextInBox("n1.2", 40, 20);
 TextInBox n1_3 = new TextInBox("n1.3\n(last node)", 80, 36);
 TextInBox n2 = new TextInBox("n2", 30, 20);
 TextInBox n2_1 = new TextInBox("n2", 30, 20);

 DefaultTreeForTreeLayout<TextInBox> tree =
         new DefaultTreeForTreeLayout<TextInBox>(root);
 tree.addChild(root, n1);
 tree.addChild(n1, n1_1);
 tree.addChild(n1, n1_2);
 tree.addChild(n1, n1_3);
 tree.addChild(root, n2);
 tree.addChild(n2, n2_1);
This will create a tree like this:
NodeExtentProvider.
If all nodes have the same size you can use a FixedNodeExtentProvider
instance with the proper width and height.
In general you will create your own NodeExtentProvider implementation.
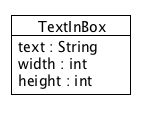
Here each node contains its width and height. So your NodeExtentProvider may look like this:
 public class TextInBoxNodeExtentProvider implements
         NodeExtentProvider<TextInBox> {

     @Override
     public double getWidth(TextInBox treeNode) {
         return treeNode.width;
     }

     @Override
     public double getHeight(TextInBox treeNode) {
         return treeNode.height;
     }
 }
Configuration to customize various aspects of the
TreeLayout:
DefaultConfiguration class will be sufficient.
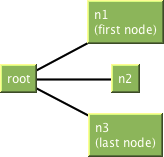
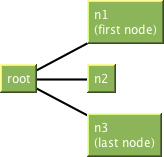
| Top (Default) | Left | Right | Bottom |
|---|---|---|---|
|
 |
 |
 |
See getRootLocation.
| Center (Default) | TowardsRoot ("top of level") | AwayFromRoot ("bottom of level") |
|---|---|---|
 |
 |
 |
Alignment in level when root is at the left:
| Center (Default) | TowardsRoot ("left of level") | AwayFromRoot ("right of level") |
|---|---|---|
 |
 |
 |
Of cause the alignment also works when the root is at the bottom or at the right side.
SeegetAlignmentInLevel.
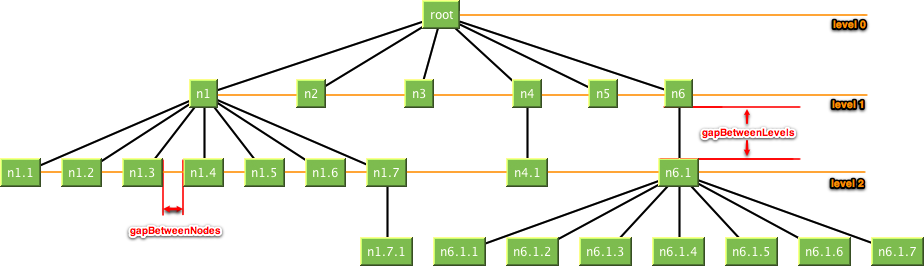
See getGapBetweenLevels and
getGapBetweenNodes.
The following figure show the results running the TreeLayout algorithm on a MacBook Pro 2.4 GHz Intel Core 2 Duo (2 GB Memory (-Xmx2000m)). The variously sized trees were created randomly.
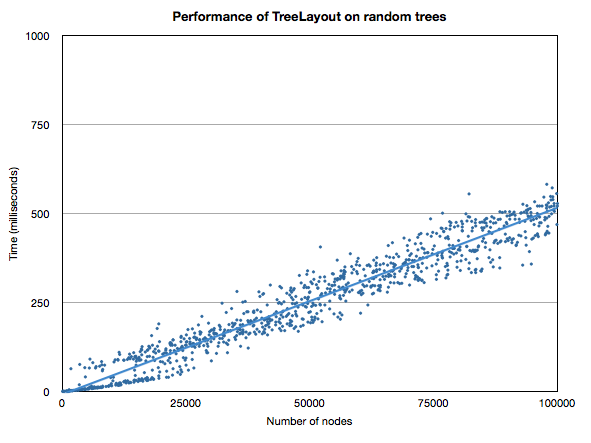
The picture illustrates the linear time behavior of the algorithm and shows the applicability also for large number of nodes. In this setting it takes approx. 5 µs to place one node.
[2] Buchheim C, Jünger M, Leipert S. Drawing rooted trees in linear time. Software—Practice and Experience 2006; 36(6):651–665
[3] Reingold EM, Tilford JS. Tidier drawings of trees. IEEE Transactions on Software Engineering 1981; 7(2):223–228.
|
||||||||||
| PREV PACKAGE NEXT PACKAGE | FRAMES NO FRAMES | |||||||||